

Multifunctional space is all the rage these days and for good reason; why not utilize what you’ve got before trying to move out to something that will more than likely not be worth the cost anyhow? When we purchased this house, the garage was just that space to be transformed. I had a plan in my head and recently I’ve been putting that plan into action: building a new darkroom, art room and shop all in one space.

The planning stage
The garage was a prime candidate for this, mostly due to it’s overwhelming space. Designed as a three car tandem, it just so happened that tandem car space in the back was over 200 square feet (roughly a 19 x 12 foot room) and would make a very nice space.
The room would serve three purposes. Use #1 was as a wet/dry darkroom for both film development and printing. The room didn’t have any running water, and while it would have been nice it wasn’t a necessity I was willing to put in myself or pay for (we did rather fine without running water in our last darkroom). Use #2 was that it was going to be used as an art room, and house Monica’s canvas and paper, as well as our matte cutter and heat press. Use #3 was that I was going to use it as a shop, and house my tools and projects.
Let’s build a wall!
Since I had never built a partition wall before, I set out to ask friends and family who have experience (and in a few cases, contractor licenses) exactly how I should go about doing this. They were all very helpful and explained everything that I’d need to do and assured me that I would not have any trouble. Most said the electrical would probably be the biggest headache depending on how the wires were run.
The wall itself was pretty basic:
- Measures about 12 feet wide by 10 feet tall
- Wide 36 inch door placed in center so that I could get things in and out with ease
- Four (4) 20 amp plugs, plus two light switchs
- 16 inch on center studs
- Single header, single treated base plate for concrete
Having defined what I was building, I ordered the lumber and had it delivered. Total cost of the stud lumber was around $60.
Getting to work on the wall, I laid out my header and base plate and marked stud locations, my king and jack studs for the door, and my cripple studs for above the door. Next, I laid out my studs and measured and cut them to size. I then laid out all the pieces on the floor to make sure I had everything in place correctly before I started hammering in the 16d nails. Some people thought I was crazy when I told them that I wasn’t renting a framing nailer, but I just didn’t see the point for such a small job.

Getting the wall pieced together was easy, but since it weight a ton, I need help getting it lifted and secured. With the help of my brother Jim, my sister Katie, and my wife Monica we were able to lift the wall up and into place. Initially, the wall was secured to the outside walls by doubled 2x4’s on the sides attached to studs while using a 4 foot level to make sure we were plumb and level. Later, Monica and I drilled holes into the base plate and concrete using a 3/16" Tapcon drill bit (you’ll need a hammer drill to use that masonry bit) and attached the wall to the concrete using 3 1/4 inch Tapcon concrete anchors (which I really like). Finally, we nailed in the header to the ceiling joist and that wall wasn’t moving an inch.
Running electrical
If the room had lots of plugs (it only would have 1 on the exiting wiring), I wouldn’t have run any electrical into the wall. I had done some wiring in the past and given that there happen to be a few electricians in the family, I knew who to turn to for help and advice. All the electrical in the garage was run in the attic (with drops to the what few outlets there are in the walls). Frankly, I just didn’t want to have to climb into the attic, but I needed power to that room.

The garage and the garage lights are on two separate circuits (not unusual). The first thing I went to work doing (besides turning off the breakers) was re-wiring the lights so that the main light and the safe light above the door (for film development) could be controlled by switches in the room. This wasn’t terribly hard, only requiring me to install a couple of junction boxes in the attic that handled the power re-route and the switch to the light. The plugs would be on the existing GFCI protected 20 amp circuit in the garage, and required me to install only one junction box to bring a branch of power into the wall.
The wiring in the wall itself (as you can see in the picture) is pretty straight forward once the power was run from the attic into the wall. I added a junction box that would be accessible in wall (to code) so that I could run power to the other side of the wall (since it was nearly impossible to get to that side of the attic).
My time in the attic was long, hot and miserable. But it was worth it.
Drywall, insulation and mud
My buddy J.Smith was kind enough to help me pickup the drywall I would need finish the wall. He even offered to help me install it, but I decided I wanted to try to do it myself before enlisting the help of friends. I should have just enlisted the help of friends.
Drywall is unwieldy. I’m working with a 10 foot wall, and I have and 8 foot piece of dry wall. Since I was told to start from the top and work my way down, I measured and cut the plug and switch holes from the drywall and then used a screwed a ledge into the studs to hold the drywall in place will I put in a few screws. It required a special touch to say the least, but I didn’t destroy any pieces and everything fit rather nicely.
Once I got the drywall and insulation in place, taping and mudding the wall to completion become my next mountain. I was told by many a person that mudding a wall was more art than science. I fully agree with that statement; I took my time over the course of a week (dry times and work and what not), but I have no doubt someone skilled in it could do better. In the end, it looked quite good, though not perfect.
Wrapping up stage one
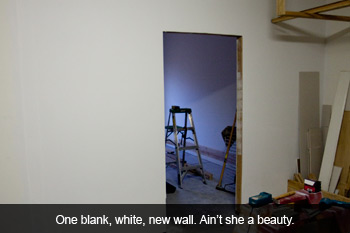
After the final coat of mud had dried, I applied light texture, painted the wall on both sides a matte white, and applied plug and switch covers. Breakers on, everything working great. I decided to not mount the door until after the benches are built. Yes, I could put the door on and be using the room right now, but I’d rather take a little more time and finish it out right. With that, bam, one wall built to code, done.
All in, the total cost of materials ran me under $175 (not including the door, which can be had for as little as $40 from my searching). This includes the lumber, drywall, insulation, mud, wiring, and supplies. If you’re buying a lot of the tools for the first time, you might want to plan for that as well.
With the wall complete, I can now move on to stage two which entails building out the work benches on both sides of the room. I’ve already started doing this part of the work (all of my lumber has been cut), but will chisel away at it slowly.