

It has been nearly two years since Monica and I moved into our house. We’ve made steady improvements but the big project was to convert our three car tandem garage into a two car garage with a 200 square foot darkroom and workshop. It took a while, but we finally declared the room light tight this last week, so paper and film development can begin. What does it look like? How about some photographs.
Entering the room
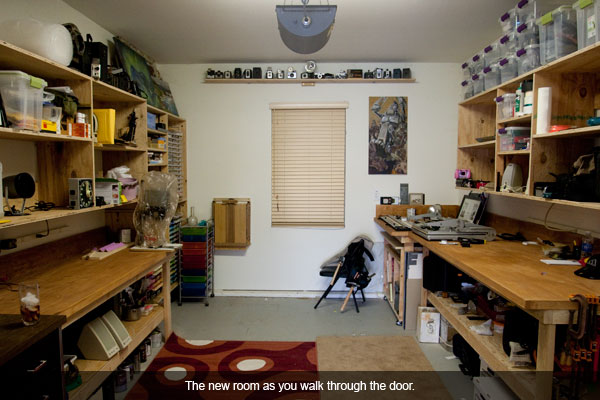
The room did in fact turn out to be just about 200 square feet. To try to keep the floor plan open, we stuck to benches along both walls with cabinets. Everything you see is custom-built from the raw lumber (sans the paper racks and enlarger base). To the left you have what we’re calling the wet side (for film and paper development) and on the right the dry side (for anything but wet materials). The hanging object in the picture is a Kodak Model D safelight (the rooms main lighting is not shown).
The left side
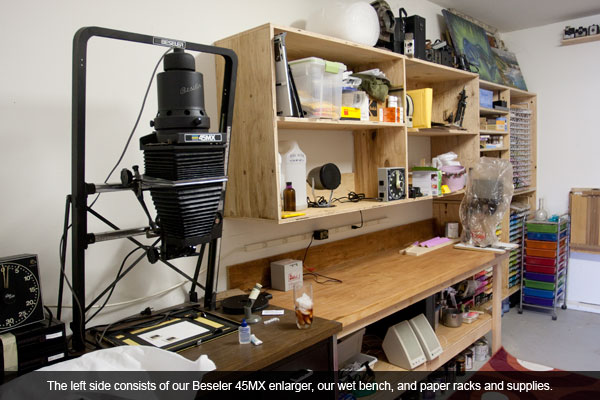 In the corner houses our Beseler 45MX. If it looks odd, it's because it's custom mounted (thanks to the fine work of my Dad some years back) to a 1970's era metal desk. The bench on this side measures 7 feet long by 27 inches wide with a 6 inch backsplash. The bench is coated with water sealer you'd use for decks; it works a treat for cleaning spills because nothing penetrates the wood. The cabinets are 7 feet wide, 3 feet tall, 16 inches deep.
The paper rack cabinets
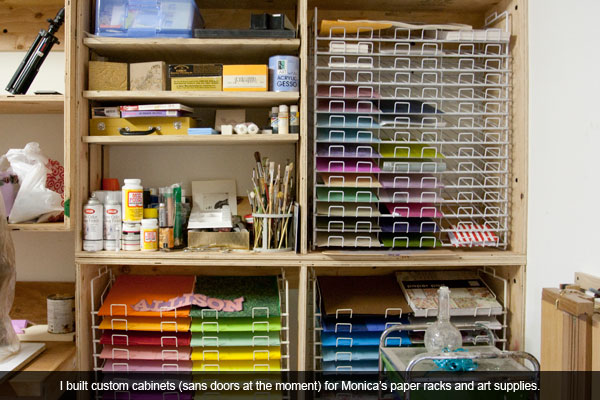
Monica picked up three paper racks for scapebooking materials from a store that had closed for next to nothing (because Craigslist rocks). Because of their size, we lost about a foot of bench space that we had originally planned, but it was inconsequential. These cabinets span 5 feet, are nearly 8 feet tall, and are about 14 inches deep. Because we had an extra spot, we added movable shelves for supplies. We were going to put doors on them, but it actually brings a lot of color to the room so we decided to leave them open.
The right side
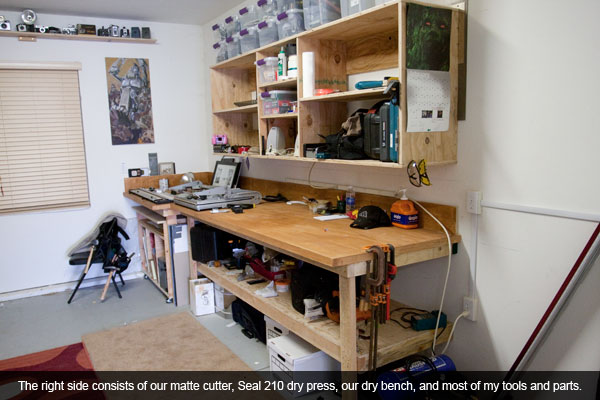
The right side serves a few purposes and is built a lot differently. The bench is 12 feet long, but varies in the depth because of the dry side materials we use, including the matte cutter (which required at least a 4 foot by 3 foot space) and the dry mount press (which weighs a ton and required at least 30 inches of clearance to the back). This bench is also 38 inches tall, allow a lot more space underneath the bench for tools (such as my sliding compound miter saw and our kiln). The cabinet is 8 feet long and 3 feet tall, with the center a 2 foot section allowing movable shelves.
The movable workbench
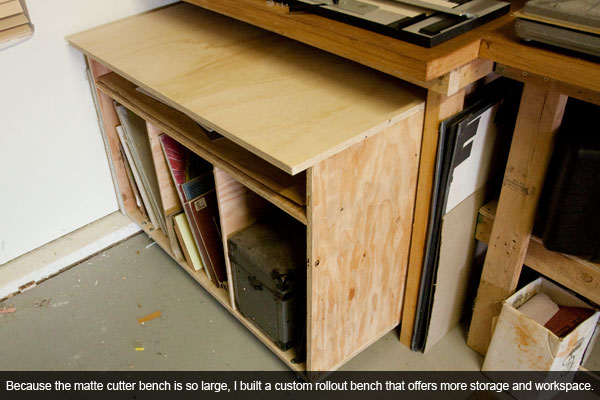
Due to the increased size of the matte cutter bench, instead of fixed shelving, I built a movable workbench that simply pulls out. This creates a large work area that is much shorter (good for our daughter) and allows a lot of storage for larger painting canvas and matte board.
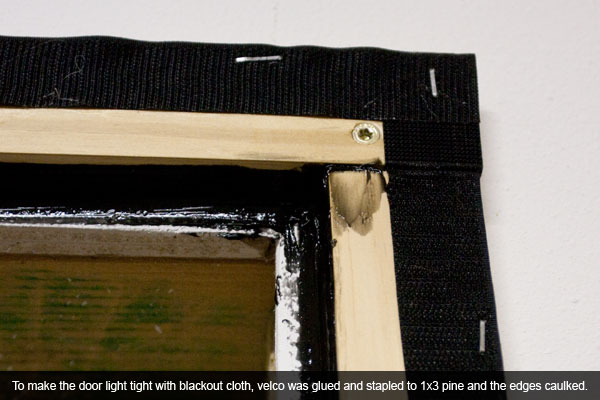
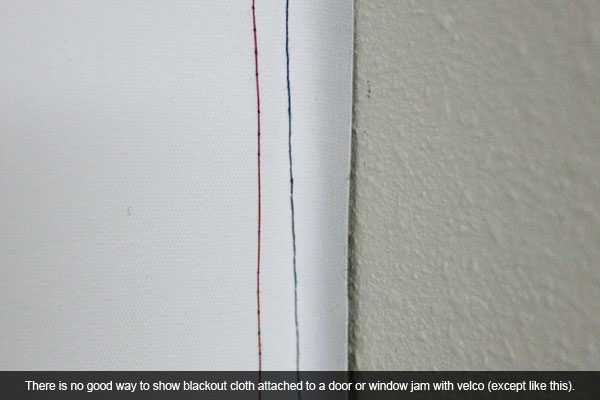
Getting light tight
Getting light tight can be difficult to do in any darkroom, and we didn’t want the room in complete darkness all the time (it does double as a painting studio and workshop, so light is a good thing in those instances). What we decided was to use light covers for both the door and window made out of blackout cloth, available at most fabric stores. Monica sewed velcro onto the material, and I attached velcro to the window frame and to the door frame via industrial adhesive (the staples in the picture I later found were not needed, but more of a safety measure). I caulked any remaining seams to block light. It’s hard to show, but briefly below you can see sort of what we did.
The finer details
There are a massive amount of details to this build out that I’m not going to cover in this first article. I can tell you that all in I spent about $600 on lumber, nails and screws to build the benches and cabinets (of which some it went to Alli’s tree house).
Indeed, there is no sink or running water even though we’re using it as a darkroom (gasp!). This might seem shocking to some, but given we’ve had two past darkrooms with no running water, we’ve never had a problem with washing or cleaning up. While getting water into the room would not be a problem, the drain required was a problem (and we simply couldn’t justify the cost to have it completed).
Many thanks
While Monica and I designed the room and I built a significant portion, that doesn’t mean we didn’t have help. At the risk of forgetting people, many thanks to:
- My wife Monica, whom was patient, helped put the benches and cabinets into place, was my rock and ever vigilant in making sure I didn’t kill myself
- My four year old daughter Alli, who learned to chew and spit sunflower seeds and helped build the work benches
- Our parents, Dave, Darlene, Manuel, and Arcelia, whom let us borrow trucks and tools on many occasions
- My Dad for giving me tips and tricks when I was stuck (you could have your own show Dad)
- My sister-in-law Lety for swinging a hammer in the wall building cause
- My brother Jim and sister Katie, whom helped lift the wall into place
- My buddy James Smith, for helping me haul and move lumber and drywall
- My buddy James Duvall, who helped me build and lift some of the cabinets into place
- My grandfathers Les and Ray, my uncles Lance and Rich for their expert advice
- Everyone else I forgot, of which I know there are many
Next time…
I’ll get into the nitty gritty details of just how this build was completed, and the tricks I used to save money and time. Until next time, keep those creative ideas flowing!