

While at Maker Faire Bay Area this year, Alli was quite enthralled with Herbie, the mousebot that would follow light and get itself out of a corner. She didn’t beg me for it, she just gave me the “I’m sure I could learn to build it Dad” line, and how can you say no to that?
So I picked up a Herbie the mousebot at the show in the big shed of goodness. You can also buy it directly from the manfacturer Solarbotics if you like as well.
A beginner kit, sort of
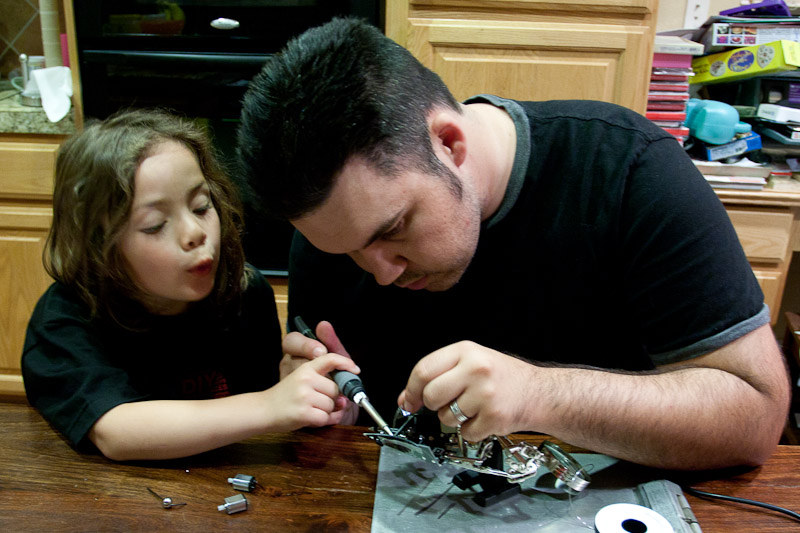
The kit is deemed a beginner kit that should take about two hours to build. Now, I’m not saying a novice couldn’t do this in two hours, but I suspect it’ll take you longer. Alli is just about seven, and we built it together over the course of two days in about four hours. We went slow, I let her read the manual and ask questions, I offered the steady hand as seen in the picture below (which kudos to the wife, who snapped that with our SLR while carrying both twins!). Quick note: long stretches of soldering for a seven year old is tiring; the mind is willing, but the overall steady stamina isn’t. If she was a bit older, I suspect she could have done the entire thing by herself, but she’s still a novice at the soldering thing. I wasn’t just going to give her an iron and walk off.
Which brings me to the manual. The manual we had wasn’t so good on the pictures. A kid would probably want better prints of the pictures to build off of (you can download a color version of the manual in PDF, which is much easier to read). Could have been the print we had, who knows.
Other than the pictures, the text was quite good; Alli didn’t have any trouble reading it and the jokes are good. I will note, that if you’ve working through the manual with your kids, they’re going to want Oreo cookies (which are not included).
Putting the thing together
As the parts in the kit go, we weren’t missing anything. The PCB was well made, nothing hacky about it.
Once you get soldering things together, you run into some pain points. They’re not problems persay, they’re just…harder that you think.
First issue we had was actually holding and soldering the PCB edges together. Even with masking tape and a set of helping hands, those joints aren’t easy, namely because you have to align them just right otherwise things won’t work.
Second issue we had was the motor placements. If you misalign the placement of those motors, you’re in for a headache. Even when you place them correctly, the 9V battery is going to be really tight fit. It took a bit of force to sqeeze the battery in (which helps hold the battery in place I suppose), but it almost feels like you’re going to break it (even with proper soldered joints).
Third issue, the whiskers. The whiskers and how they work is a major pain. You have to loop them, properly group and bend them at the right angle and length. It looks easy, but it is not. I spent more time trying to get the whiskers right than on anything else. If you put them in wrong your mouse won’t quite work as advertised (the whiskers are what it uses as collison detection).
Great kits limit errors and just work
Beyond those pain points, we actually had no major problems. We soldered everything up, popped the battery in place, and everything worked. Alli ran around the house with a flashlight making the mousebot chase.
From my Dad perspective, that makes Herbie the mousebot a good kit. It may take longer than the manual says and it may have some additional difficulty, but it would be terribly hard to make it not work. When it’s up and running, it’s also a great deal of fun, and if my daughter is smiling then we have success!
I’d buy another one (I’m keen to chain them up using the IR LED they include), though I don’t expect the seven year old to sit still the entire build. :-)