

Disclaimer: as with any hack/maker approach if you do attempt this modification you’re doing so at your own risk to camera destruction or malfunction. Also don’t stare at flashbars or any flash for that matter. You know the drill.
The internals of the Polaroid SX-70 are both incredibly fascinating and mildly frustrating. The fascination stems from novel approaches that lead to an amazingly useable camera by masses of people. The mildly frustrating part is trying to control the camera to make exposures in 2021, particularly when it comes to electronic flash usage.
It’s not a secret that SX-70 film needs a lot of light to make viable exposures. With a today’s SX-70 film rated at ISO 160 and no manual controls other than the beguiling light/dark wheel, we don’t have a lot to work with when it comes to low light. This is further problematic when using flash because electronic flash wasn’t yet a thing and instead we had flashbulbs and in the case of the SX-70, flashbars. Flashbars are ridiculous in terms of brightness and have zero output control. You fire it and people see spots for a day. If you run across one, try it. It’s like you’ve brought the sun indoors and people will curse you as they stumble around.
Which leads to the problem and the novel solution that the SX-70 used to deal with that brightness: if a flash is attached, it’ll stop down via a cam follower based on the focus distance. Not just stop down, but stop down: in the original patent it notes f/107 and in chatter in SX-70 circles somewhere around f/256. Sounds crazy, but again, try a flashbar and you’ll see why.
The above explanation is at best a vast simplification of just how novel and clever the whole SX-70 shutter/aperture are and frankly I’m selling it short. Joaquín de Prada of the OpenSX70 Project wrote a great article on the SX70 shutter. If you’re interested in the science and engineering, I highly recommend it.
In my case, I really wanted to do away with the restriction of the cam when using either my custom rig or my studio lights. I turn to the old and I would contend fairly well known modification, the constant f/8 flash mod. In the old guide, it gives a couple of smallish photographs and don’t go into the notion of calculating the flash output you might use with this mod. So let’s do some hacking.
The Tear Down
Note: you will not be able to use flashbars with this modification applied. Be advised.
First, let’s take a look at the exploded parts from the SX-70 repair manual to get an idea of what we’re going to do.
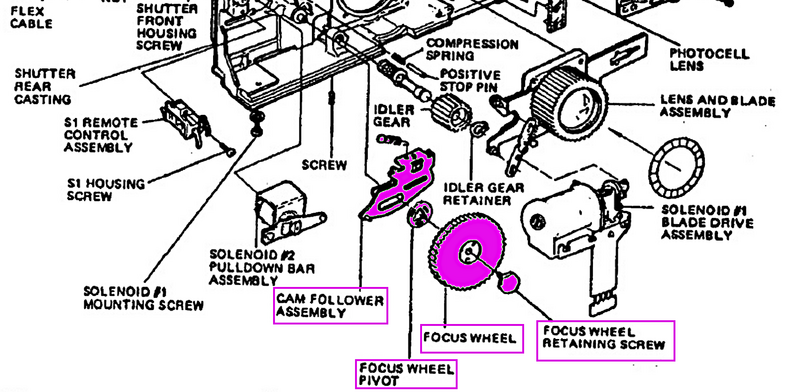
Just three parts separate us from the cam follower assembly that we want to remove to give us a more workable aperture for our flash photography. The biggest issue with getting to those parts is what SX-70 version you have. If you have an Alpha this mod is quick to perform given the shutter housing cover can be removed with little more then pulling the outside tabs out, no tools required. If you do not, things get very complicated because it requires a 1mmx1mm square bit (which you’ll likely have to make yourself, it’s not an off the shelf tool).
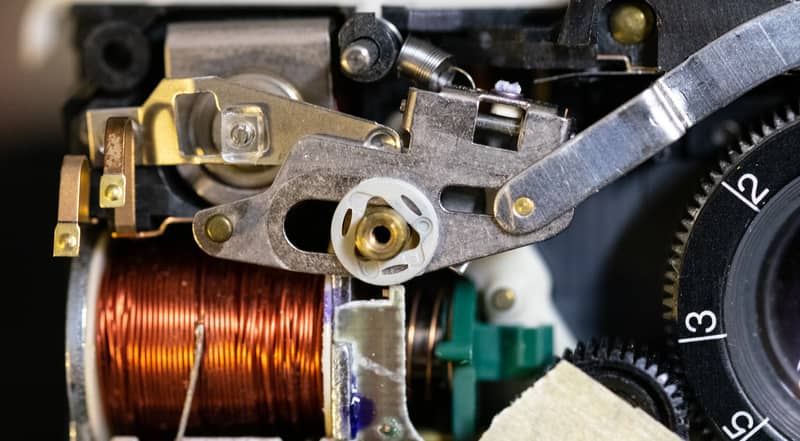
Once you get the cover off, you’re greeted to the terrifying notion that you may screw this up. Welcome new maker/modder, relish in this feeling.
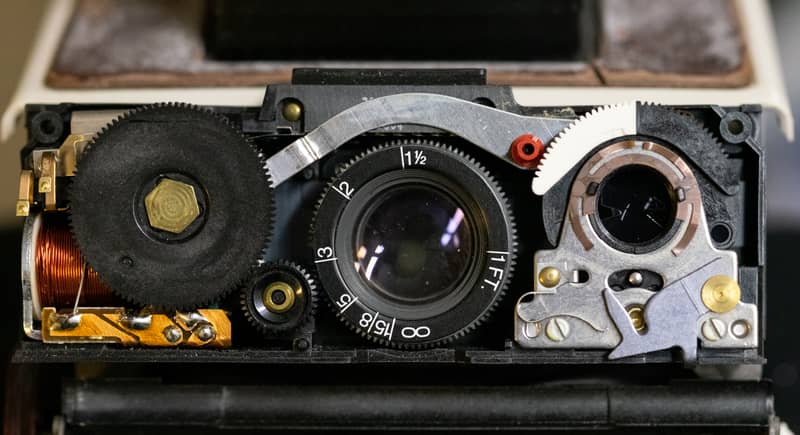
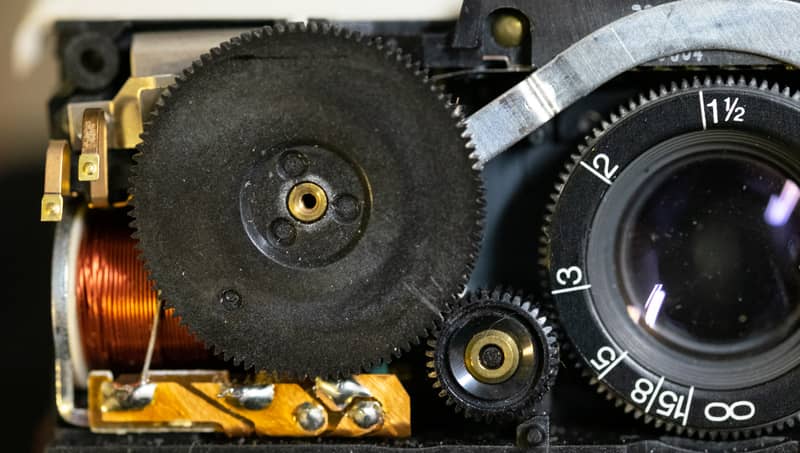
First things first, rack your lens out to infinity and mark the focus dial and the idler gear. I did this with masking tape and razor cut to make alignment easier, but you can draw a pen or pencil mark as needed. Just don’t lose the spot otherwise things won’t turn out quite right—you’d have to deal with lens collimation and frankly that’s outside the scope of this mod.
Now we have to remove the focus wheel retaining screw. If you read the repair guide, you’d think there was no way to get that screw out without a special tool, but in reality this screw is usually easy to remove with nothing more than fine set of needle nose pliers. I’ve never run into one that is tight, it just requires a fine touch.
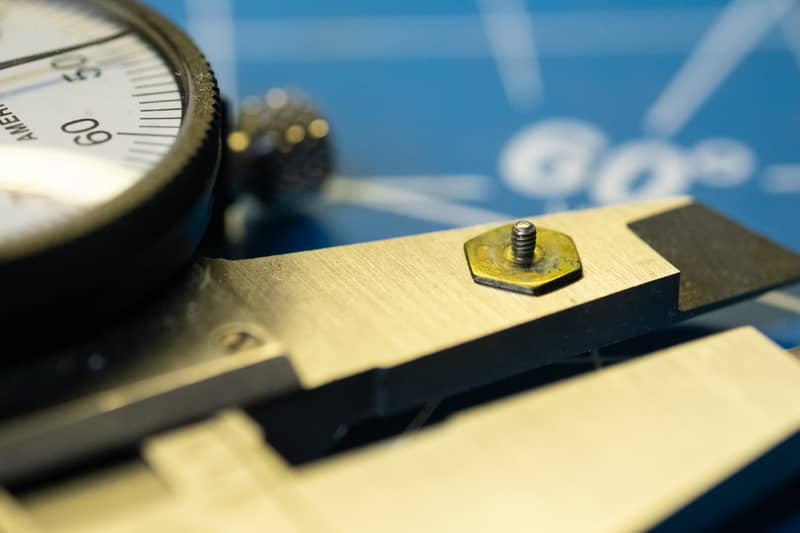
Once removed, the focus wheel will come off and you’re left with a view of the cam follower assembly being held in place by the focus wheel pivot retaining ring.
You’ll want to grab a pair of tweezers and carefully unhook the cam follower spring. If you’re heavy handed, you will break it and then there is no return if you want to put the cam back in later. Once unhooked, you have to remove the focus wheel pivot, which on most of the Alpha’s is a plastic retainer ring. This part is a little tricky as it is push fit tight and if you apply uneven pull pressure when attempting to pull off you will break it.
Once you have the focus wheel pivot retainer off, you now unhook the trim link and the solenoid #2 pulldown bar assembly. This requires no tools and simply slips away with little friction or effort.
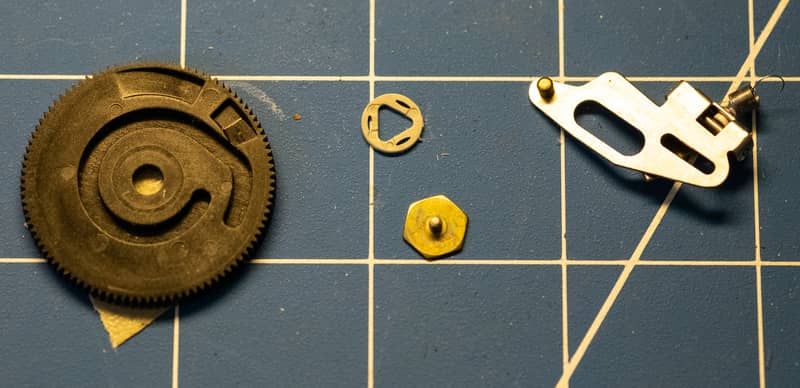
At this point, the cam follower should be able to removed and you’re left with all four highlighted parts from the previous exploded view on your workbench.
We now work backwards. Push the focus wheel pivot retainer ring back into place and then place the focus wheel into place, noting your alignment tape/line from the beginning is aligned. Finally, add the focus wheel retaining screw. This can be hard to start given the 0-80 fine thread, but go slow and do not over tighten.
Finally, check that the focus wheel and idler gear are properly moving the lens assembly. If that looks good, click back into place the shutter front housing and your mod is complete.
Using the Mod with a Flash
Once back together, it’s time to coble together some flash tables. I’m going to do so with my Godox TT600 Thinklite Flash, since it’s what I use on the handheld rig and it’s readily available. You could do the following for any flash you have, including the MiNT Flashbar—which I still use from time to time and like very much, but I always found under powered for close focus shots for an unmodded SX-70.
I am not an expert on flash lighting. I use it rarely and while I understand the concepts and the math—the inverse square law is pretty cool—I prefer material tests whenever possible. That said I needed a place to start the testing. The Godox TT600 Thinklite Flash has a guide number of 60/197 (m/ft), but the devil is in the details with guide numbers. In this case, that’s 1/1 power, ISO 100 @ 200mm zoom, and for the SX-70 I would expect to run the unit at 50mm given the field of view for the lens. Simple you say, look at the guide number table in the manual to find the relative guide number for 50mm. Unlike Canon or Nikon flash units, this table is missing in the Godox documentation.
Breaking out the flash meter, I calculate the TT600 50mm guide number at 24/80, e.g., f/8 at 10 feet. Given that at beyond 6.5 feet the SX-70 is f/8, I can work the math backwards and come to the same guide number—e.g., guide number = distance × f/stop, 10ft × f/8 = 80. A quick test shot with the flash at 1/1 power and camera at that 10ft, I end up with an optimal exposure.
I then used the aperture and coupled distance reference from the SX-70 Exposure Control FAQ in combination with some back-of-napkin math—the guide number calculator is a better start point—I put together some very rough numbers on paper to test further with my Sekonic meter and film.
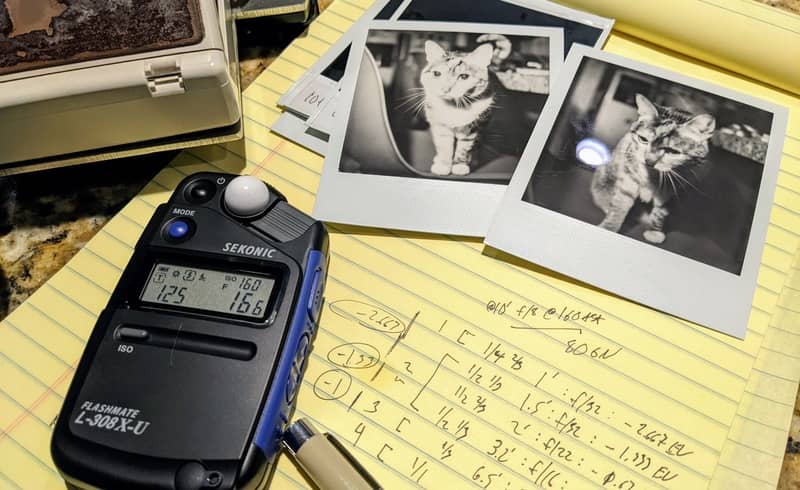
While my math was okay—my terrible handwriting notwithstanding—the nuances of the film and camera combine to give some variability in use. In the below image test you can see a silly copy-to-legal-pad mistake led to an unideal exposure but an interesting data point.
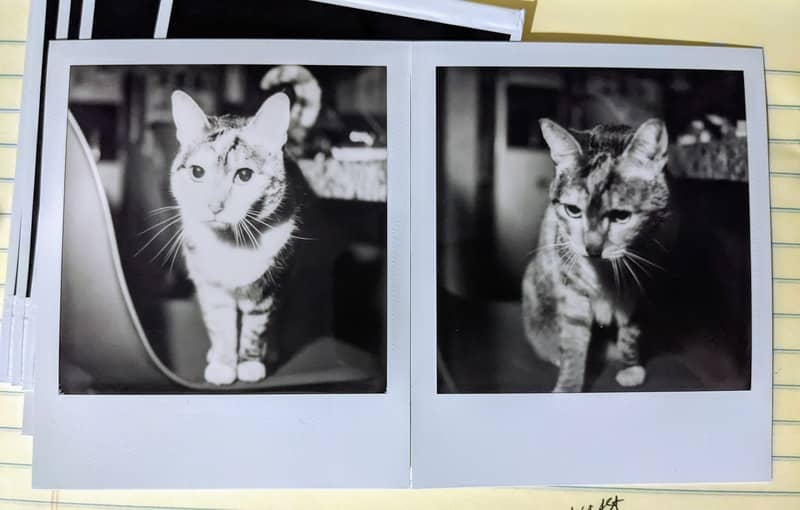
The above exposure to the left is blown out and lacks detail at 1.5 feet, which I consider successful as a data point given that was near impossible before the modification. The adjustment to the right shows significantly more detail and really highlights why I undertook the f/8 modification, showcasing smooth bokeh that was unachievable before the modification at that distance.
From a does-the-test-match-the-calculations, for the most part this is true, but you have to cook to taste your exposures to be what you want them to be. Having metered, shot, compared, re-compared, I have come up with the following Polaroid SX-70 f/8 Modified Flash Guide for the Godox TT600 Thinklite Flash that fits my tastes.
| Distance | Aperture | EV Offset @ GN 24/80 | Godox TT600 Setting |
|---|---|---|---|
| 1.0ft / 0.3m | f/32 | -3.667 EV | 1/8 -0.7 |
| 1.5ft / 0.4m | f/22 | -2.667 EV | 1/4 -0.7 |
| 2.0ft / 0.6m | f/22 | -1.667 EV | 1/2 -0.7 |
| 3.2ft / 1.0m | f/16 | -1.333 EV | 1/2 -0.3 |
| 6.5ft / 2.0m | f/11 | -1.000 EV | 1/2 |
| 10ft / 3.0m - ∞ | f/8 | 0.000 EV | 1/1 |
As the table shows, the f/8 modification to the SX-70 makes the Godox more than usable for our purposes. The nuance is subtle where we deviate from the math and focus more on the test results. For instance, at 6.5 feet / 2 meters @ f/11, the math tells us that should be a -0.3 EV, not -1.00 EV, but in testing I found the -1.00 EV exposure held more detail. Your mileage will indeed vary based on your own look and feel you’re trying to achieve, but the table works for my use and may be a good start point for you on your SX-70 f/8 modification adventure.
Concluding Thoughts
The f/8 modification for the SX-70 has been around for as long as I can recall. I quite like the look in comparison to the incredibly sharp photographs produced by the higher geared apertures with flash pre-modification—when they came out no less, which was usually highly under exposed. The increased predictability when using the flash at closer distance to subjects is an added bonus in this regard.
Now to go do some photographing. Happy instant photographing!📸